Well, here it is! The long-awaited, long-overdue and just plain long Lost Turntable Guide to Recording Vinyl.
What took so long? (And why is it so damn long?)
Well, what I thought was going to be a quick cut-and-dry “how to” guide slowly began to morph, mutate and altogether spin out of control. When I first started writing this thing I thought it was just going to be nothing more than some tips and tricks on recording records. But then I decided I should expand it to be a more conclusive guide covering the entire vinyl ripping process, but once I got there I realized that I had include sections on hardware and software too…
So yeah, things kind of got out of hand. But here it is! Split into four convienent and hopefully easy-to-understand chapters.
Chapter one deals strictly with hardware. Turntable, pre-amps, cartridges. I go over my recommendations and what I think you should look for when choosing gear.
Chapter two is all about software, the recording and restoration software that I think is must-have if you want to do this right.
Chapter three is an in-depth step-by-step guide showing what I do when I record vinyl. It’s only 100% applicable if you’re using the exact same equipment and software as I am, but even if you’re not it should help you out a bit.
And finally chapter four is where I offer some tips, tricks and links that didn’t fit anywhere else.
So without further ado…an introduction.
Introductions and Disclaimers
Before I really get going, there are two things I want to get out of the way.
First, I’ve been recording vinyl for six years now. I learned as I went, making a ton of mistakes along the way. And I’m fairly certain I’m not done making mistakes. So if at anytime during this guide you think I’m full of it, or doing something horribly wrong, I very well might be. Let me know! Just don’t be a jerk about it. I’m always looking for ways to make my rips better, so any polite and constructive criticism is welcome.
Second, this is not a guide on how to record vinyl “on the cheap” or “fast and easy.” This is a guide on how to record vinyl properly, with high-quality results that are worthy of being in your MP3 collection. You can’t do that quickly, easily, or inexpensively. Not including my computer, my final cost for my set-up, which includes my turntable, cartridge, pre-amp and recording/restoration software cost me over $600, and that’s substantially cheaper than what many “audiophiles” pay for their set-ups. It sucks, but this isn’t an endeavor for those who aren’t willing to spend a bit of cash. Sorry.
Okay, now that I have that stuff out of the way…let’s do this!
Chapter 1 – Hardware
Turntables
This part is pretty important, so you might want to take notes.
If you ask me, there’s only one turntable in the world worth getting (more on it in a bit). However, I realize that not everyone has the same tastes as me, so before I offer my singular recommendation, let me extend a few general tips you should keep in mind when picking a deck.
First of all, always avoid USB turntables. Almost all of them are abominations that can neither effectively play nor record vinyl.
Why?
First of all, most use ceramic needles. In addition to sounding horrible, these things destroy records. They’re outdated garbage, keep them away from your vinyl.
Secondly, many use built-in pre-amps (a pre-amp boosts your phono signal so it can be heard properly), and those just don’t cut it when it comes to sound quality. Your music will sound muffled, muddled and altogether bad. Whenever I go back to recordings I made using my old ION USB turntable, I can’t believe how hideous they sound. It’s like they were recorded underwater.
Finally, recording straight from a turntable to your computer via a USB port isn’t as easy as it might seem. You’ll get a lot of interference from the electronics in the turntable, and the process itself takes a lot out of your computer’s resources. It’s just not worth the hassle.  Get a real turntable, you can hook it up to your PC with little effort.
With that out of the way, the biggest decision you’ll have to make when choosing a turntable is whether you want a  belt-drive or direct-drive model.
With a belt-drive turntable, the motor is connected to a belt, which in turn is connected to the platter. The motor spins the belt, and the belt spins the platter. On a direct-drive turntable, the motor is connected directly to the platter (typically underneath), spinning it directly.
Which usually sounds better? It’s a contentious subject. Some believe that direct-drive turntables can create a noticeable “hum” in your recordings. Â Others, myself included, don’t like belt-drive tables because they don’t always spin at the right speed. Belts wear down over time, and a worn down belt will cause your turntable to spin too fast (audiophiles call this “flutter”). It’s the kind of thing that you never notice at first, it only comes to your attention after you’ve recorded half-a-dozen records at slightly the wrong speed. It can be maddening.
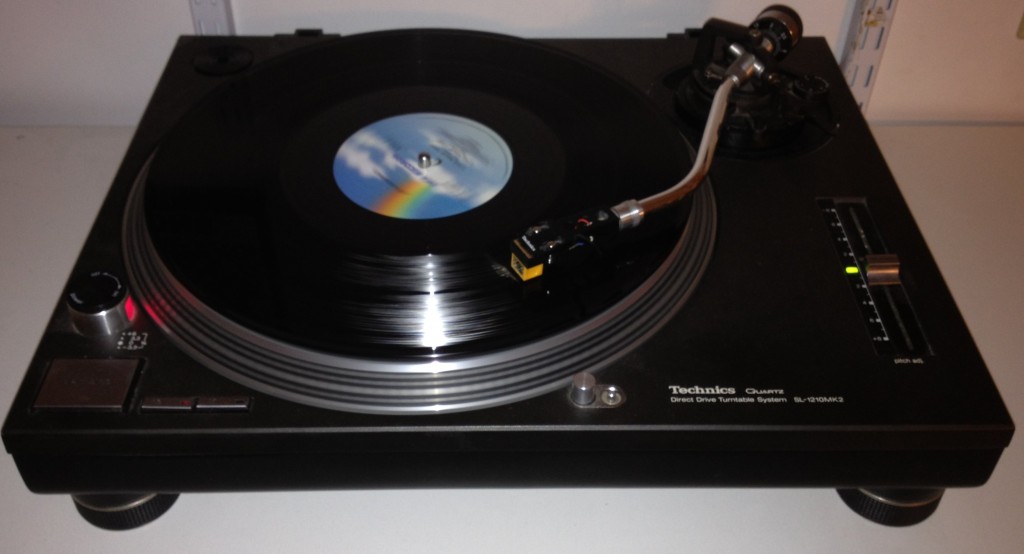
On the other hand, I’ve never heard any noticeable “hum” coming from any medium-to-high-end direct-drive turntable I’ve owned, and they always spin at precisely the right speed. I’ve been told that super-high-end belt-drive decks, ones that cost upwards of a grand, don’t have problems with flutter, but I’ve never wanted to spend enough money to find out. I would recommend a direct-drive deck, for ripping vinyl it’s almost always a safer bet. In fact I would recommend one direct-drive turntable in particular, the  Technics SL-1200.
In all honesty, if you want a turntable that sounds great, runs great and even looks pretty damn great, then just get a Technics. There’s a reason why nearly every turntable on the market today is trying to emulate the look and feel of the Technics SL-1200. It’s because they’re some of the best turntables ever made. Sadly, Panasonic shut down production of the Technics line a few years ago, so you probably won’t be able to find a new one at a fair price. Don’t let that stop you though, since the Technics 1200 was one of the most popular turntables of all time, you can usually find one used online for less than $300 if you know where to look online. I picked one up on Craigslist for $300 and it was worth every penny.
Cartridges
While I have no problem recommending just one turntable, I can’t do the same with cartridges. There are just too many out there that it’s impossible for to keep track. The best advice I can give you when choosing a cartridge is to do your research. Different cartridges work better with different turntables. So go to Google and search for something like “best cartridge for [turntable model]” and see what comes up. Check out AudioKarma, that’s my go to message board for this stuff (although most people there will tell you that direct-drive decks are the devil). The audiophile message board nerds who talk about this stuff are usually good sources. Just don’t spend over $150-$200 for a cartridge if you’re just getting into vinyl, you should be able to find a decent one for between $70-$100.
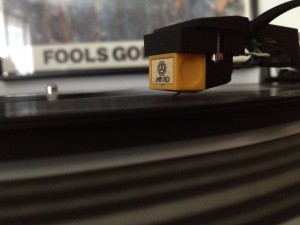
Me personally, I play all my records using a Nagaoka MP-110 cartridge. From everything I’ve read, it comes highly rated for Technics SL-1200 turntables, and is fairly priced at around $100. Of all the cartridges I’ve used it has the best stereo separation and the best tracking; it also doesn’t amplify bass or polish the audio in anyway, it just plays the records accurately and beautifully.
Conversely, I recommend you avoid the Ortofon Arkiv (lousy tracking, too sensitive), DarkHorse Sanyo (horrible all around) and the Stanton Groovemaster (too damn heavy and loud). But once again, that only goes for the Technics SL-1200 and for recording vinyl, results may vary with other kinds of turntables.
No matter what cartridge you end up going with, I suggest buying it from The Needle Doctor, the best site for turntable supplies on the Internet.
102/24/13 Update
While I still recommend the Nagoka MP-110 for most systems, I recently discovered that for whatever reason, the cartridge did not play nice with my new computer. I don’t know why and I can’t explain it, but for some reason when I upgraded my computer all my recordings became muddled. When I replaced my cartridge with another model, the problem disappeared!
If you find yourself with this problem, then I recommend the Audio Technica 120E/T. It’s also about $100, and gives a sound that is nearly identical to how the MP-110 used to sound on my system.
Pre-amp/Soundcard
Often overlooked, a phono pre-amp is a vital part of any turntable system. These special amplifiers are made with turntables in mind, and raise the levels of a turntable signal to the proper volume/EQ settings that make it possible for you to hear your records at a comfortable volume. If your turntable doesn’t have an internal pre-amp (and it shouldn’t, those suck) you will need a pre-amp in order to listen to and record your LPs.
In addition to a pre-amp, you’ll also probably need an external soundcard, unless your internal card has a line-input. And even if it does, it’s still not a bad idea to get an external soundcard. Most internal cards just aren’t cut out for recording from a line signal. It’s hard to explain, and I don’t entirely understand it, but I was never happy with the results whenever I tried to record vinyl using my internal soundcard. Everything always sounded like half the treble was missing.
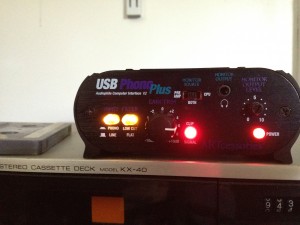
Fortunately, you don’t need to buy both an external soundcard and a pre-amp, as there are a lot of pre-amps made today that function as both. I’ve used a few, and the one I’ve gotten the best results with is the  ART USB PhonoPlus v2 Computer Audio Interface.
This thing is a godsend. It requires no drivers, has optional built-in hum removal (great for tape recording or if your system has a lot of R/F interference) and it only takes a few minutes to set up (which I’ll get to in another section). I really cannot recommend this thing enough, nor can I say enough good things about it.
Conversely, I can’t say enough bad things about any external soundcard made by M-Audio. While these guys make great professional-grade (translation: incredibly expensive) hardware, their entry-level stuff consistently proved itself to be completely worthless to me. It never works right, requires a ridiculous amount of drivers, and it even crashed my system to the point where I had to re-install Windows 7. If you have a choice between an M-Audio soundcard and getting punched in the gut, I recommend the gutpunch.
…moving on.
Chapter  2 – Software
Recording/Basic Editing Software
There are a lot of ways to go here. Some people really like Audacity, and it’s really hard to argue with free and open-source…unless you’re me.
I’m not a fan of that program, I find it clunky, hard to understand, and needlessly complicated. It’s also a resource hog and slows down my system whenever I’m working with it. I avoid it. My own personal preference for recording and basic editing software is Sony Sound Forge Audio Studio. It’s probably a little over-powered for what I do, but it works, it doesn’t slow down my system, and it’s easy to use. Those are three very big selling points for me. It’s also great for whenever I do want to do something a little more complicated with my audio files, such as adjusting the EQ settings or fiddling with the playback speed.
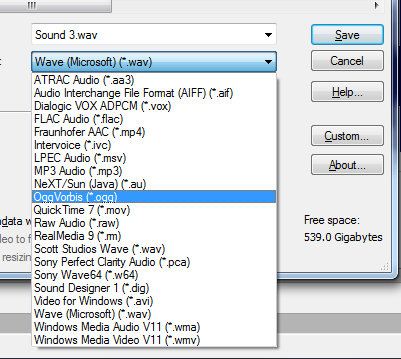
Sony Sound Forge Audio Studio also gets a ton of little things right. It’s ultra-versatile, allowing you to record in quality as high as 32-bit/192,000 Hz audio, and you can save in just about any format you could desire, including WAV, MP3, FLAC and even OGG. It also allows you to zoom in and out of an audio file by using your mouse’s scroll wheel (something Audacity cannot do), which is incredibly handy when removing pops and cracks from a recording. It’s also very efficient and fast, I can edit and save a file in Sound Forge in about half the time it takes me to do so in Audacity. So, yeah, it might not be free, but my time is worth the money.
Click Removal
No matter how good your system, no matter how clean your records, you will hear the occasional snap, crackle or pop in your recordings. There’s nothing you can do about it. However, you can remove most of them with the help of the right click removal software. Ever since vinyl has come back a ton of programs have appeared on the market claiming to be able to restore even the most haggard of records to near-CD quality. For the most part, these programs are hogwash. Either they don’t remove enough of the clicks and pops, or they remove all of them at the expense of the overall fidelity of your music.
To date, I have only found one program that can easily remove most pops and clicks from a recording while not affecting the quality of the recording. That program is ClickRepair. Setting it up can be a bit of a bother (I’ll get to in my next section), but once you figure out how it works it can be a real life saver. ClickRepair has saved recordings that I thought were lost causes. It costs $45, but it’s totally worth it in my opinion.. But if you’re hesitant to spend the dough without giving it a test drive, a trial version is available at the official website as well.
Hum/Noise Removal
Sometimes when you’re listening to vinly you might pick up a kind of hum or hiss that’s omnipresent over your entire recording. Typically it’s radio frequency (R/F) interference. If you have a decent turntable and pre-amp, then you shouldn’t be having this problem. Before you go the software route, try moving your equipment around; hook it up to a different power outlet; or try some different cables.
However, not all hiss and hum is caused by R/F interference, some records are just naturally noisy. It can be especially annoying if the music on the album is quiet (Tangerine Dream albums have this problem far too often). If that’s the case, then you might have to go the software route to scrub your recordings free of hum and hiss. One program I’ve found that can do this pretty well is the iZotope Music and Speech Cleaner. While it doesn’t work miracles, it does a good job of removing these incredibly annoying noises on exceptionally quiet records. Like ClickRepair, iZotope’s Music and Speech Cleaner isn’t free, but there is a trial version available for you to check out before you shell out the bucks.
ID3 Tagging
ID3 tags are metadata on an MP3 file that tell you the name of the track, what album it’s from, the artist and so on. For years, I just used iTunes for this, until I discovered that for some reason iTunes does not like creating ID3 tags for songs I ripped from vinyl. Why? I have no idea. But whenever I had to rebuild my library, any ID3 tag I created in iTunes came out broken, song titles would vanish, genres would change, it was a mess. Now, the only thing I use iTunes for is to number the tracks after I give them ID3 tags.
For everything else I use MP3Tag. It’s free, works like a charm, and has a ton of batch editing features that make tagging large groups of files a breeze. I love it.
Okay, now that you know what hardware and software I use, it’s time for me to show you how I use it!
Chapter 3 – The Walkthrough
As I said before, this walkthrough only details how I do this using my equipment and nothing else. That’s all I know, so that’s all I can give. If you want help with other kinds of pre-amps, turntables or software, I can’t help you. Sorry.
So let’s get started.
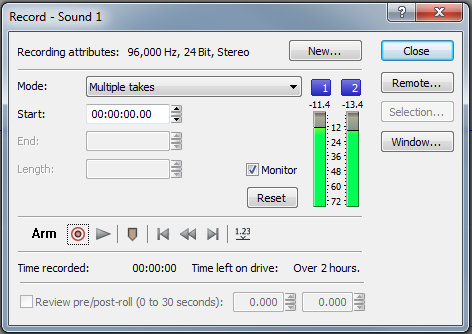
As I said before, I do all my recording on Sony Sound Forge, but before I commit to a recording, I make sure all my setting are accurate. To do this, I start a recording that I will not save, and drop the needle somewhere in the middle of the record. I try to find an especially loud part to check the levels.
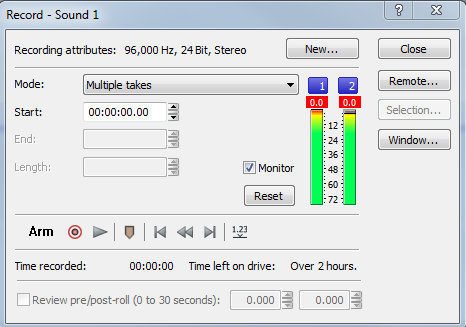
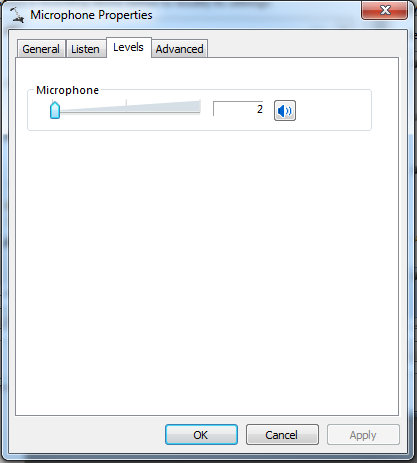
Red is bad, that means my levels are too high, which will lead to clipping and distorted sound. I have to go into Windows’ audio settings and make some minor adjustments.
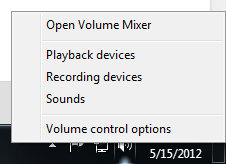
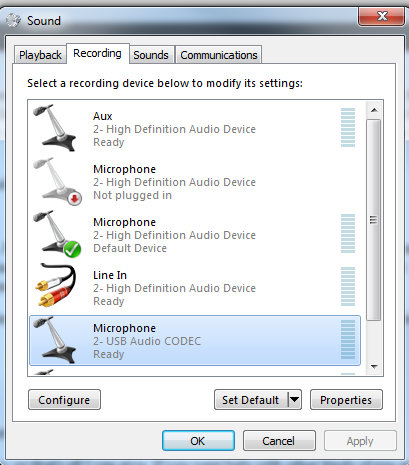
To do this, I right-click on the speaker in the task-bar and select “Recording Devices” from the pop-up menu that appears.
Next up, I make sure that my pre-amp isn’t doing some clipping of it’s own. The ART V2 has gain controls on it, complete with a monitoring light that tells you if the gain is too high. While I rarely need to adjust my Windows volume settings, I often have to change my gain settings on my pre-amp, as some records can be much quieter than others. You always want to have as much gain as possible without the signal going into the red, this cuts down on hiss and other line noise that can be a real pain to get rid of later.
To make sure the pre-amp is set up right, I once again drop the needle on a loud section of the record and look at the signal light. I adjust the gain settings until it is as loud as it can be without the signal going into the red.
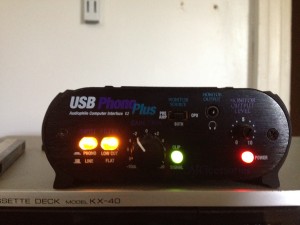
Green is good! Most albums are fine with a gain of around -2, but for some quieter albums I crank it up a bit.
After that’s all set, I can move onto actually recording and listening to my record, which for the purposes of this example will be Polyrock’s 1980 self-titled debut.
I usually record one record at a time. Some people will stop a recording after each side as to keep the size of the audio files down. I usually don’t find that necessary, but whatever floats your boat is fine.
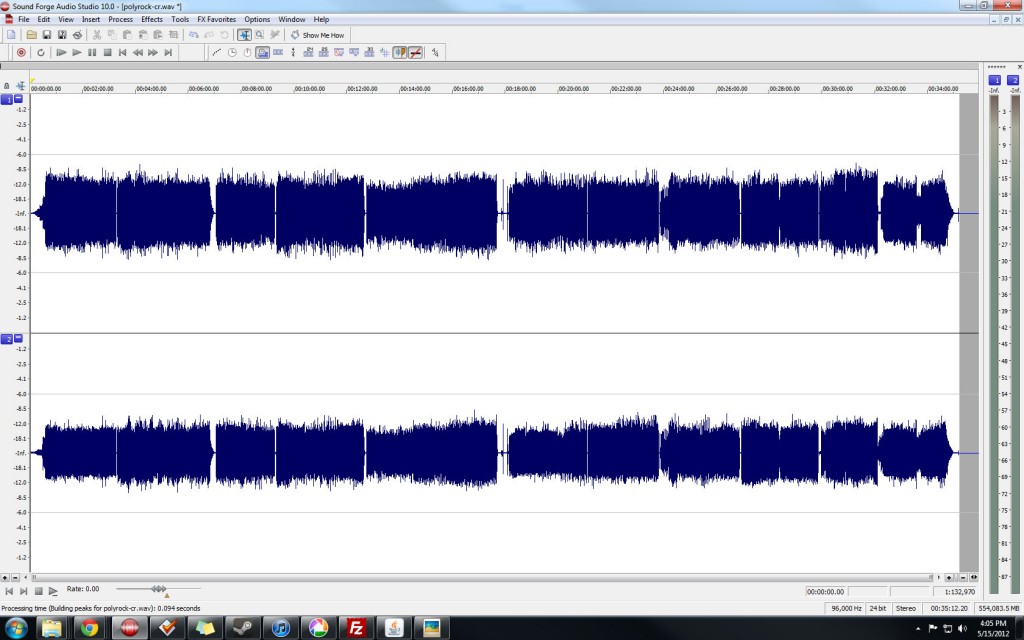
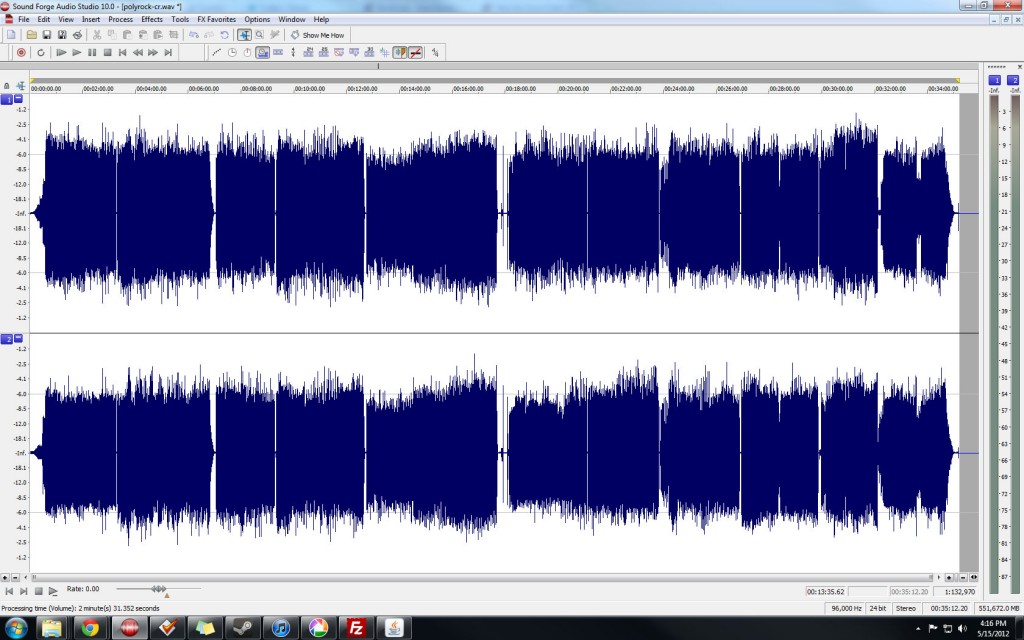
After I’m done recording the album I hit stop in Sound Forge, and I’m presented with a waveform of the album.
Now, before I do anything I save it as a WAV file. Most sound editing programs like ClickRepair can only read WAV files, so its best to save them in that format. I don’t convert my recordings to MP3 until I’m done doing everything else.
After I save the file as a WAV I open it in ClickRepair to clean it up a bit. ClickRepair is an amazing program that can work wonders, but not at the default settings. For ClickRepair to work right, without any noticeable distortion or unwanted sound removal, I always tone it down a bit by adjusting the following settings, which were suggested to me from Paul at Burning The Ground:
Then I run ClickRepair on auto. Some people use it manually, but honestly, I don’t know how, and even if I did, that seems like it would take forever.
ClickRepair doesn’t overwrite the original file, instead it saves a copy with a “CR” suffix added to the file name. After it’s done running, I open that file, along with the original, in Sound Forge and compare them. If I see any major differences between the files’ waveforms, I listen to compare and make sure no music has been removed along with the clicks. I would say that 99 times out of a 100, there are no problems. But if I’m recording drum and bass, glitch (obivously) or anything that actually incorporates the sound of a record click into the song, then ClickRepair might have a problem with it. In those cases, I usually go back to the original file and manually edit it. It’s actually easier than it sounds. All I do is zoom in until I am able to highlight the defect and nothing else and then I just delete it. These clicks are usually less than a tenth of a second long. I don’t lose any music when I delete them, just the defect.
(If there’s any hum or hiss in the recording, this is when I go into iZotope to try and fix that. Since that program is 100% idiot-proof, and I almost never use it, I’m not going to go into that.)
Now the file is declicked to the best of my ability, but there’s one problem left I need to tend to.
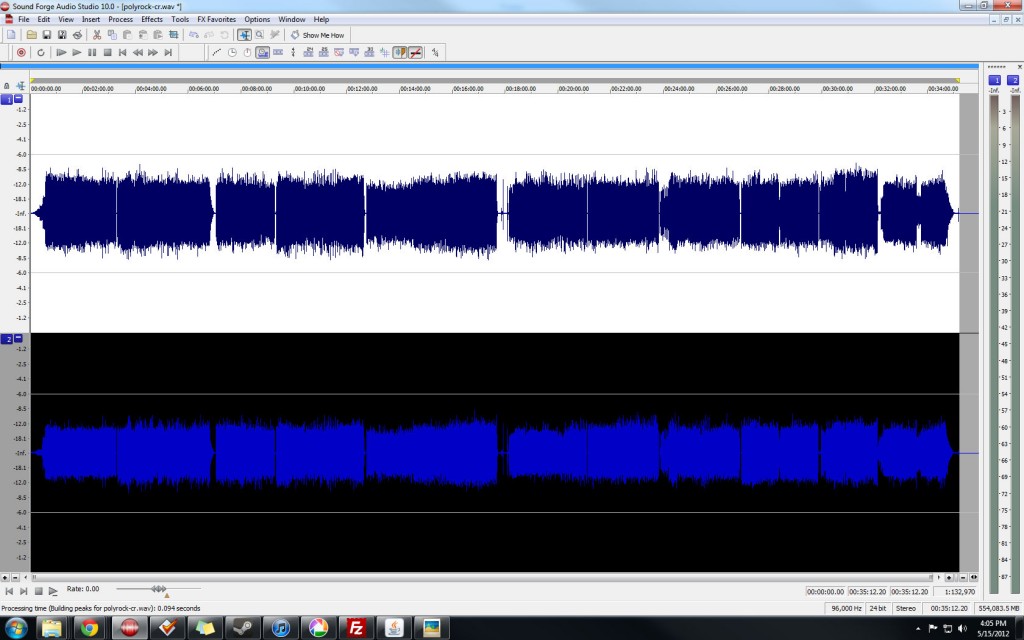
If you look closely, you may notice that the right audio channel is just a hair quieter than the left channel. This is a problem that I’ve run into with many turntables and cartridges over the years. Truth be told, it’s not much of an issue. The difference between the volumes is actually barely noticeable, if at all. However, since it is a fixable problem, I usually take care of it. While the difference in volume can vary from album to album, I’ve found that a volume of change 115% usually takes care of it. This is how I take care of that:
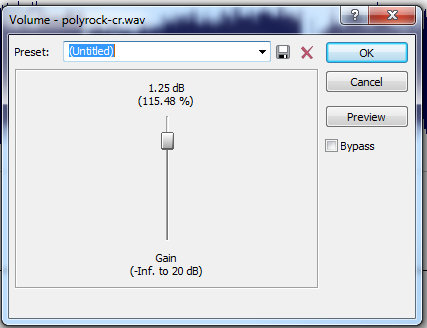
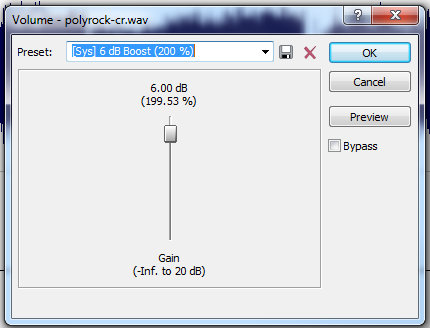
Then I go to “Process” and then “Volume” to open up this menu. I adjust the bar so it’s increasing the volume by 1.25 dB (115%).
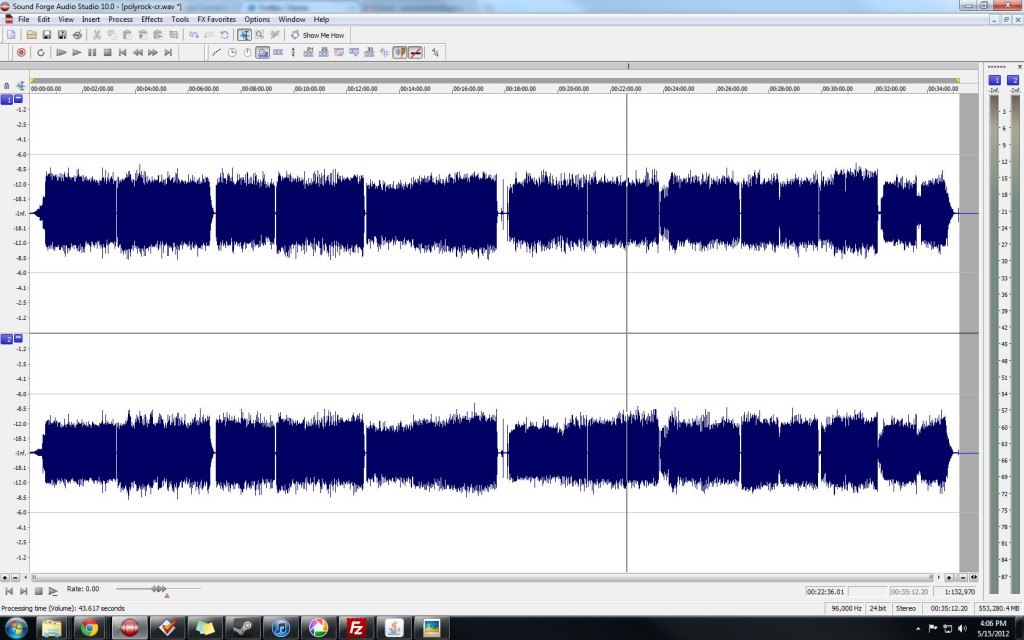
It’s never perfect, but it’s usually good enough,and your ear won’t be able to tell the difference anyways.
Now to make one more volume change. While there’s nothing wrong with the recording as it stands now, it’s a little too quiet, especially when you compare it to newer songs, which are far too loud. While I don’t want to equalize my recordings to match the over-compressed volume of those new recordings, it wouldn’t hurt to boost them a bit by going back into the volume adjustment settings.
Now that reocrding has been cleaned and adjusted to the best of my ability, it’s time for me to cut it up into individual tracks by selecting them one at a time; pressing “CTRL+X” to cut them out of the audio file; opening a new audio file; and then pressing “CTRL+V” to paste the song into that new file. Then I save the file.
I’m old school and stick with MP3s, but if you’re super-concerned with audio quality, then you can always go FLAC. As far as my MP3 settings go, I always save at 320Kpbs and at 44,1000 Hz. I’m sure some audiophiles out there are screaming at me right now, but I’ve tried higher sample rates and other formats, I honestly couldn’t hear a difference. Sound Forge also lets you choose encoding speed. Go for quality over speed every time.
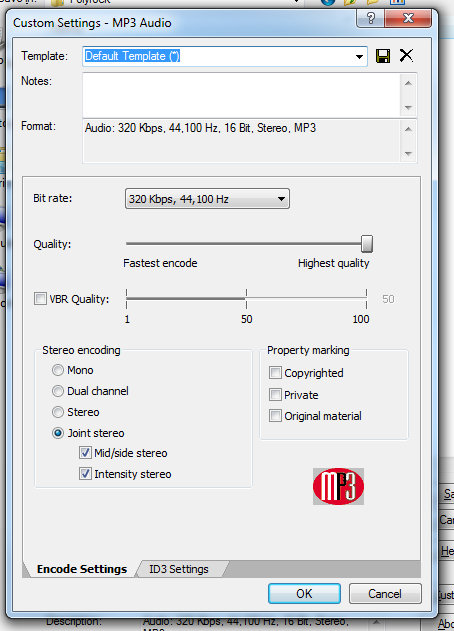
My custom MP3 encoding settings. I’ve never heard a difference between Joint and regular stereo, so don’t ask me about it.
When I save the songs, I make sure that I save them in the proper directory in my iTunes library (artist name/album name). As far as file names go, I just name them the title of the song. This comes in handy for the next step, editing the files’ ID3 tags.
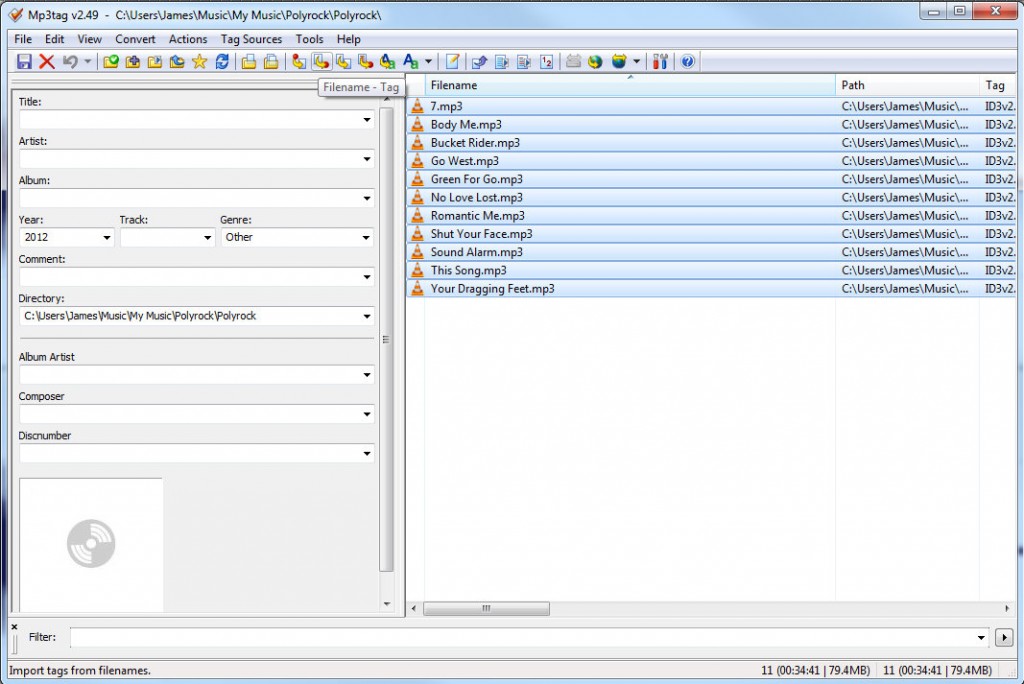
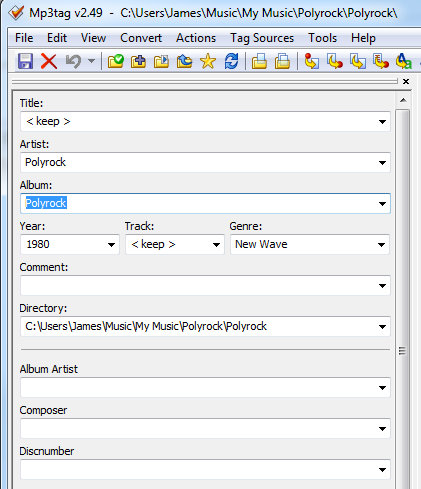
As I said before, I do all my tagging in MP3Tag. I love its interface. After I drag the songs I want to tag into the program window, Â I just have to do the following:
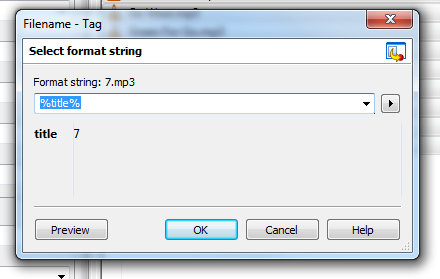
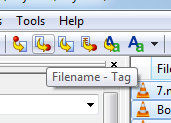
The “filename – tag” button creates an ID3 tag based on the filename. Since my filenames are the song titles, I just set the parameter “%title%” and it fills in the title field with the filename.
MP3TAG is kind of a pain when it comes to track numbers, so I do that part in iTunes, after I’ve imported them into my library. And in case you’re wondering, I import my tracks into iTunes by creating a new playlist and dragging the songs into it. From there I can go into the song information, add track numbers, and make any other minor adjustments might be needed.
And that’s it! I now have my album recording, cleaned up, converted and tagged, ready for listening. Recording time not included, it usually takes me about 15-20 per LP, with 12″ singles and 45s taking no more than 10 minutes. Of course there are always exceptions to the rule, some albums are so scratchy that I have to clean them manually, and if a record has a skip in it that’s a whole other beast. But for the most part it’s not that time-consuming, it only becomes a chore when I let 20 recordings sit on my hard drive for a week and I have to plow through them all in one sitting. Â Even then, I find the process oddly soothing, like its something I can do to shut my brain off from the outside world and just zone out on for a bit.
Chapter 4 – Addendum/Tips
Properly Set Up Your Turntable
You could have a $100,000 turntable with a $10,000 cartridge, but it will all be for naught if you don’t set it up right. I almost wrote a guide for this as well, but there are a ton of them on the Internet already. Here’s a good one that should explain everything you need to know.
Clean Your Records!
If you’re buying used records, then you need to do your cartridge a favor and clean those bad boys before you plop them on your turntable. A record may look clean, but there could be boundless amounts of gunk, dirt, dust and grime hidden in its grooves. Not only does all that make your recordings sound worse, but it can even damage your records. You want to clean your records, and the best way to do that is with some sort of record-cleaning machine.  A lot of people recommend high-end motor-powered machines that can cost hundreds of dollars, but I don’t think you need to go that crazy. I use the Spin Clean Record Cleaner. It’s only $80, and it works wonders. You can find out more about it on their official website.
Some Records Just Sound Horrible
Vinyl is a physical medium, and with that comes physical flaws that cannot always be avoided or fixed. Scratches, warps and other signs of wear and tear are a way of life when you’re buying used records. But don’t assume that all new records are going to be flawless either. For example, I have never heard a 12″ single of the Eurythmics “Right By Your Side” that didn’t sound mis-pressed; I have three copies of the single to Michael Jackson’s “Moonwalker” that all skip in the exact same place; and my copy of The Chemistry of Common Life by Fucked Up came with a loud pop on the title track.
It sucks, but these things happen. Learn to live with them, fix them when you can, and don’t let your head explode worrying about them. Trust me. It’s for the best.
Don’t Get Discouraged!
This is probably the most important piece of advice I can offer. If you really want to record your records and you’re having a lot of problems getting everything to sound right – don’t give up! It took me years to really get my act together when it came to recording vinyl, and I’m still learning stuff every time I check out an audiophile message board or visit other MP3 blogs who do the same thing I do. Just keep at it, and you’ll get better!
And if you really love your music and the sound of vinyl, it’s totally worth it.




I wish I had this when I started copying lps to mp3s. I had no one to show me what to do and had to figure everything out by trial and error. Well presented and well written, now please just pop it into a time machine and set the date for 1/1/2 please.
I’ve started reading but couldn’t finish it yet. I had retweeted your tweet, however, I attempted to post this on Facebook, but as no pic is available for posting this, even though there are lots of pics, I didn’t paste the link on my wall, because nobody pay attention to that isolated link, specially since it’s in English, and 99 % of my “facebook friends” are Spanish speakers, so, since it’s not a blog post yet, I will paste it when I can post it with a pic…
But more important, thank you very much for doing this, I appreciate it, so far, it pretty interesting, what else could it be? I am a vinyl freak as well… best regards, Javis
So my question is, when I want to play some of your ripped tracks on my radio show, can you venture a guess as to why their levels are significantly lower than MP3s I get from other sources like other websites (with everything from original digital files to vinyl rips of their own) or even my older CDs? It can’t just be a function of “Some Records Just Sound Horrible,” because I have to push the levels on almost every one of your rips to get them to come close to the levels of the rest of the show’s songs. Am I blowing out my listeners? Are the levels I want just higher than you prefer to mix them? Or — gulp — is this still not The Perfect Ripping Solution?
Hmm…I’ll look into the pic thing. Thanks for the tip!
First of all thanks so much for wanting to play my rips on your radio show! Also, I never claimed my way was perfect! It’s just how I roll.
A few things. I know my rips are quieter than most other sites. I like it like that. I mean, if I want it loud I turn it up, and I have noise equalization turned on for all my music playing software, so nothing blows my speakers out. I try really hard to make my rips as loud as possible while not causing any clipping. My next post, for example, will have a Happy Mondays song. If I made it any louder then it would have clipping. I do think that the Loudness Wars are at least partially to blame here. But I’m willing to admit that I may be doing something wrong.
Why don’t you check out those other recordings to see how loud they are? Are they clipping? If you can find an old CD that you don’t have to turn up, compare it to one of mine that you do, can you give me an example? I’m perplexed!
I thought most radio stations ran their songs through compressors that normalized everything already? I know I’m not making mine any louder. Unless someone can show me how to make them louder without causing clipping I’m keeping them as is.
wow! you’ve created an epic piece of walkthrough-ness there. thank you so much for the tips on how to rip vinyl. i’m definitely going to save this to my computer for easy backup so i can print out a copy of it.
Excellent, and thanks.
Thanks for all the work you put into this post. Now that I’ve been informed of how inexpensive it is to hook my turntable (also an SL-1200, also dusty but it has a plastic cover) via the ART interface ($79.95 on Amazon) I’m gonna do some ripping. One thing that you pointed out is something I’ve been telling people mostly to no avail: vinyl does NOT always sound better than the CD version. There are some really shittily-remastered records out there that sound nowhere in the league of their digitally remastered CD counterparts…then again there are some horrible sounding CD masters. In my opinion the first indicator of music quality is the MASTERING, the format is secondary.
Again, thanks for this great primer!
Hi there!
Great guide overall. I just have two tiny comments that you might consider: all recordings are to some extent biased towards higher levels in the left channel. This is because of the general psychoacoutic phenomenon of (most) listeners having better hearing on the right rather on the left. Ideally, the gain of the right channel should still be less than the gain on the left channel to achieve a more “natural” sound. I do agree that a 15% difference is too high, though. Also, a single crackle or pop in one or both channels can be missed by simply running the waveform through software. Often this clips the entire signal (albeit very briefly), but this can unfortunately throw off the gain that has to be applied from track to track, even when recording from a single record. Just something to keep an eye on.
Thanks…
Yeah, even after I adjust them, the left is still slightly higher than the right, but thanks for the info!
Hi LT,
Great guide.
Once thing I want to know: do you able to ground your Technics 1200 to the ART USB Preamp? I have a Technics SL1210 MK3 and am wondering if I need to ground the wire?
Cheers,
My Technics is modified so it doesn’t need to be grounded. However, you could ground the turntable to the preamp if needed.
I’m a little confused then. If it isn’t grounded, don’t you get a constant hum when recording from your turntable?
No. The dude who did it specializes in removing ground wires. He modifies the turntable so it doesn’t need to be grounded anymore. I’m not very technical, so I don’t know the specifics, but here’s a blog I found that talks about it.
http://djbolivia.blogspot.com/2011/03/how-to-self-ground-technics-1200.html
Thanks for the comments, I appreciate the questions!
Thanks for your responses.
Can I also ask what shell you use for your needle? I have a concorde and like the needle you recommend, hence I would need to get a shell for it. Are there any things to consider why buying a shell?
Mine came with the deck, but just about any will do. Ortofon and Audio Techinca make decent ones in my experience.
Hey mate, brilliant run down on how to rip vinyl, best on the web.
I’m just starting to get into/understand vinyl ripping and I’m just wondering if you had any view on other turntables to use?
The Technics SL-1200 seems to be by general consensus the messiah of all turntables, but because it’s out of production now they are pretty hard to find for sale (within a reasonable price anyway). I’ve been looking at the Audio Technica AT-LP120-USB, and I know you recommend against ripping with USB, however from what I’ve read it seems that turntable is modelled pretty closely to the Technics, and I’m wondering if I can just not use the USB recording option and run it through a pre-amp/soundcard combo like you recommend.
Any help/comment would be much appreciated, thanks again.
Thanks for the comment.
I would highly recommend against getting an ATLP120, for several reasons.
First of all, they’re poorly made. I had one for a while, and the tonearm lock broke right out of the box. Aside from that, they just feel cheap and flimsy, like anything on them could break at a moment’s notice.
Secondly, they aren’t fully functioning turntables. They have no anti-skate. Sure, it may have an anti-skate dial, but this dial isn’t actually hooked up to anything! It’s just there for show.
Thirdly, they are very poorly grounded turntables. Even using a grounding wire, I was never able to eliminate electronic hum in my recordings, and if you record quiet electronic music that’s a big problem.
I know the ATLP120 has a lot of good reviews. I don’t mean to sound like a snob, but most of the people who have given this deck high scores just don’t know what they are talking about, or they haven’t had it long enough to really see its faults or problems. If you want a TT for just listening or light DJing, it’s not a bad one, but if audio quality is important to you, I beg you, do not get that turntable.
Think of it like this, an ATLP120 currently retails for $217 on Amazon. Right now if you look you can probably find a used 1200 on eBay for less than $350. Either you can spend the $217 now, end up being let down, and then spend the $300+, or you can just skip that middle step and go directly to spending the $300 for a turntable that you’ll never have to replace and rarely have to repair. It’s worth the investment in my opnion.
I also wanted to thank you for providing your guide. I modified my setup and workflow quite a bit after reading it. My comments are just a few additional thoughts that might help others who are following along.
Point one is a total reaffirmation that some LPs are just damaged from previous playing and/or are poorly mastered and will never sound right. My original copy of Yes: Fragile was discouragingly sibilant ( “hissy-sounding”) in the high vocals. I eventually opted to buy a new, remastered version from iTunes.
Next, my experience with ripping old 78s is worth a comment. I got a library of old 78s from my wife’s family, including some that were recorded as one-offs by her grandfather, who was a professional violinist. In addition to a turntable that can spin at 78, I would strongly encourage you to get a stylus that was designed for those records. Usually, this is just a replacement stylus that you can snap into your existing cartridge, so it is not a big deal. Next, in addition to the obvious differences in surface noise, there were no real standards for mastering back in the days of 78s, so you will have to be a lot more patient about cleaning up those recordings. You will have to be more aggressive with ClickRepair settings. And smoothing out or muting small areas by hand can be very time-consuming. For 78s with a lot of surface noise, fade-in and -out can be your best friend. Volume levels are all over the map on 78s, so the 2 sides may have dramatically different volume levels, requiring gain adjustments between sides or even inside a single track. A hobbyist can do it (I did!), but it can be a real commitment.
Back to modern day, I would like to point out that iTunes will automatically name a new track based on the filename when you use Add File to Library or Add Folder to Library, so you can skip tagging the track name in MP3tag if you want. The only thing that is really important to tag in MP3tag before you import into iTunes is the Artist or Album Name. From there, a search for that in iTunes will pull up all of the new songs for further tagging using iTunes’ Get Info.
On the issue of left-channel volume imbalance, IF there is an argument for a lower left-channel volume (for which, I have not seen a convincing argument), then it is only on the order of 1 dB. My cartridge also initially showed a large discrepancy such as you describe. I essentially cured that in my setup by removing and reinstalling the stylus with very slight twisting pressure until the 2 channels balanced perfectly. A monophonic recording may be necessary to confirm that balance.
Finally, on the use of Volume/Amplify vs. Normalize, my understanding is that unless you are actually engineering an original song across a multi-track machine, then Normalize is fine and they will accomplish the same thing. Not sure about SoundForge; but in Audacity, if you set Volume/Amplify to something like 500% — but if that would clip the highest passages after 250% — then it figures you didn’t really want that and automatically uses 250% to prevent clipping. This has the exact same effect as Normalize, which just sets the volume proportionally so that the highest passages are 0dB. I usually separate tracks and Normalize them individually. This is not in keeping with the 1970’s era listening aesthetic of letting the Sound Engineer’s decisions come through on an album, but it is convenient for my modern music library. Track-by-track normalization is also very often necessary on compilation albums, where the old individual tracks may not have been set to a standard volume before cutting them all on the new record.
My setup is a Stanton STR8-80 turntable (no anti-skate, and it prefers 1.2+grams of force on the stylus. But it spins at 78 and it is bullet-proof), ART USB Phono Plus preamp, and Custom-built Win7 PC. When the drivers first installed for the ART USB-connected preamp (my device is listed as “Microphone 2-USB Audio CODEC”), it automatically set the default input to SINGLE-channel input. Both left and right channels sounded muddy and they visually appeared identical in SoundForge. It took me quite a while to track that problem down and switch the default input to STEREO. (Right-click the little speaker in the Windows notification area, select Recording Devices, select the USB Audio Codec device, Properties, Advanced.)
Happy Ripping!
Great article! I’ve been using a free program “audiograbber” as it automatically split the tracks for me. I was looking for a sound card solution as my PC’s internal card crapped out. I have my TT hooked up through a Realistic Stereo mixer (along with a cassette deck, eight track, and reel-to-reel) then feed it through my stereo reciever, which I had patched into my PC through ‘line-in’. Does your USB hook by-pass or disable the internal sound card? I’ve done some transfers of cassette to cd for some friends with the set up mentioned, but am always looking to improve. I have a Roxio program with usb hook up, how would this rate with what you’re using? Thanks for the article, I’m saving it to computer for future refrence.
Hello:
I enjoyed the above details on your site and request contact information so that we may speak about the audio archiving of LP’s. Please reply to the given E-mail address.
WRS
There is another option for those who prefer not to work on the computer. I have home audio CD recorder plugged into my system. I can put on an LP, set the levels, press record and digitize one track or a whole LP. Once it’s recorded to a CDRW, I can pop it in iTunes and create mp3s or lossless files. I don’t run any declicking software, but I presume one could add that step. Sound quality is excellent – it says it uses an “audiophile-grade AKM 24-bit/96 kHz analog-to-digital converter.” Mine is a harman/kardon, still readily available used.
Sounds great and fast, but if you’re record skips you’re kind of screwed aren’t you?
HI
First in cleaning a record! I use VPI Record Cleaning machine and LAST products. I do agree mostly in what your telling folks to do, howerver…in the case of better sounding files you don’t have to go to FLAC. Most folks can’t playback 24 bit anyway. Actaully you would be better off going 16 bit and 48K into a Wave(PCM). I use Sony Audio studio for the most part. I do disagree with you on one point. When the file is in wav format looking at the wav itself you notice that one channel is a bit lower then the other. It was made that way for the stereo field. You can Up the level if you wish but it’s best to leave it as is. Up the level on both channels is a good idea, depending on your current level. I allow the music to breath. -3 to 3.5 is just fine in case you have a high point in the music, try it. I have been doing dubbing from vinyl for years, from open reel tape to casette tape. No, 8-track tapes werent’ the best recordings…but for a car it was good. Hope it helps. thanks
Hi,
My process may be over complicated, but it works very well.
I record from turntable to pre-amp to analog/digital converter into a portable hard drive recorder. Then I walk up 2 flights of stairs with the recorder and transfer the files to my computer through USB. Then I separate tracks, click repair, do some minor equalizing if necessary, then save a WAV file. I have found that for some reason it sounds better in iTunes if I burn a cd from the WAV files and then import into iTunes as an mp4.
Hi,
I stumbled across this post when looking around for information on the Nagaoka MP-110 and figured I’d read it. While I agree with most of it, I did see one thing that struck me as odd.
Your experience with Audacity is the opposite of mine. I’ve used it for years and always found it to be very resource friendly (even on a 400MHz machine running Windows 2000) and quite easy to use. All the things you mention being able to do with Sound Forge are easily accomplished with Audacity. Actually, I’ve used it for hum and noise removal as well as click removal with very little noticeable change to sound quality, so external software hasn’t been needed either. Beyond that, I have used it with a flat (not EQed) phono preamp to apply the proper EQ to records mastered using pre-RIAA standards.
I would definitely suggest that you consider giving Audacity another shot. It is a very, very powerful program regardless of the fact that it is free. Sometimes you don’t need to spend money to get quality.
I Have A Stanton T-62 Direct Drive Turntable. I Use A art DJ Preamp11 Plus A Focusrite 2i2 Soundcard. I Have Been Thinking About Getting A New Turntable Like A Pro-ject Carbon Fiber Or A Music Hall 2.2. I Have Used This Table For Some Ripping But Want To Know If My Stanton Not Having Anti Skating Is It Still Good Enough. I Cannot Find Any Info From Stanton On This Subject. Also I Don’t Really Wan’t To Go With A Entry Level Table But Just Need To Know If These Entry Level Tables Are As Good As Say The Old Thorens TD 160 Or Philips 312 That I Had Owned Previously. I Want My Albums To Be The Best That They Can Without Going Overboard Financially. I Have Been A MusicIan All Of My Life And Want To Preserve My Albums. Thanks Also For Your Information. Bob
A turntable without anti-skate is really a turntable made more for DJing and less for archiving. I don’t know anything about those other turntables you mentioned, I suggest you check out the forums I mention in this post and start asking around there.
And for god’s sake don’t capitalize every damn word in a sentence.
absolutely excellent, i’m glad i found this guide very high up in a Google search cos it was nearly everything i needed to know as i plunge into the murky world of vinyl to digital, thanks!!
I use the following stuff:
Turntable kenwood kd-50f With audio technica At91 Cartridge, and I have the orinal cartridge too.
I cut off the original cables from the turntable that were of poor quality and replaced it with a double RCA panel.
Interconnect cables that I can choose from that I have are four Brands, all OFC (Oxygen free copper).
Straight Wire, Sirius Sound Concept Professional Audio Cable Ofc, B-Tech Hyperlink Total Shield O.f.c.,
Stinger Queen Double Shielded Pure Ofc Series Interconnect.
Amplifier Av Receiver Yamaha rx-v1400RDS
Sound Card Asus Xonar DS 7.1 PCI
4 brands of OFC Cables to choose
Sony Sound Forge 10.0
The turntable is connected to the amplifier with phono input.
And the output with rec out is linked to the audio in of the soundcard Asus Xonar DS.
What cables should be used and in what position should use with the cables?
Is there something here that I should modify or replace?
Hey man, if it works for you, go for it.
Hi LT,
Can you recommend a digital turntable to rip vinyl? I ask because my Technics 1200 does not record the true BPM (it is ever so slightly out – even with servicing). I need to record the BPM perfectly because my collection is being used for Traktor S4 which is dependent on the BPM which, in turn, affects the way the beat grid is set up.
Unless you have any other ideas?
Thanks!
Fix your Technics. All USB turntables are garbage.
Has anyone experimented with hydroplaning? It’s an old radio DJ trick where you spray a little bit of water on the vinyl before playing to cut down on hiss. I guess I’m really asking because I’m concerned that it might corrode the stylus. Comments? Experience?
Just discovered this site. Love it and I’m looking forward to converting my vinyl-to-digital. Does anyone have an opinion on the Toshiba SR-F430 DD turntable? Just dragged it out of the attic and was wondering if it’s worth getting serviced.
For Your Information, It’s None Of YOUR Dam Business If I Captalize Every Word In A Sentence!
Wonderful walk-through!
Question related to album art: I don’t see how to handle the addition of “album art” in Mp3tag, and being just anal enough to really want album art associated with each song or group of songs coming from the vinyl album that I ripped, would very much like to know how you or others may be handling doing it.
I did all of vinyl rips pretty much the same way you describe back in the days of Cool Edit 2000 and Windows2000, using a Stanton (my old high-quality turntable is gone, long gone) hooked to my old Dynaco stereo preamp going into an excellent old sound card on my computer. I may have skipped that part in your write-up, but one should have a high-quality sound card to do this with. It is as important as the turntable.
I ripped to wav on Cool Edit then removed noise and clicks, either manually or auto. Manual was slower but much superior. Then set the level then converted them all to 320mp3’s. Still have them as wav on a large stack of CD’s. Redoing to flac now, in the process, anyway. I take some comfort in noting that your process was just as tedious as mine was back when I did it.
Fortunately Mp3tag helps with tagging; there was not a good tagging editor back then. It should be pointed out that Mp3tag works for all types of music files, at least all of the popular ones, not just mp3’s as its name might suggest.
I agree with Argos on his comments on Audicity, which actually is Cool Edit 2000 finally updated for Windows 7, not 8 though. And it is free alright.
oops…works with Windows 8, as well.
I guess I am sort of an oddball here.
I use a DUAL turntable for recording, and record vinyl at 24 bit 48,000. I have found this to be the perfect fit because it’s not too “out of the ballpark” in terms of recording at a level that makes no sense anyway… and yet it’s a high enough level where it can make a huge difference in editing.
The only thing I worry about is quality. I don’t care about physical space, digital space, or cost. In my little mixed up world, all those things are of no consequence. I just want the best, quality recording of the audio so it’s preserved and can remain in this world longer than me.
I just recently purchased a large group of sealed 12″ records from the early and mid 1980’s. Upon breaking them open, I record the audio on first play. I then have an over-sized glass scanner, and I scan the album art (both sides) at 400 dpi. I then take out any natural imperfections on the artwork, as well as the audio tracks.
I recently spent about 45 minutes cleaning up a 4 min “dub” mix of a track.
Then when the audio is all mastered, and the artwork is all mastered, I convert it to a CD single. I then also save it as a “digital” CD single in MP3 format. I then save all the files on several hard drives–one of which resides in a bank vault. (yeah, seriously).
Now I have questions, and would welcome all or any input:
1. Why in the hell do almost all vinyl records have a difference in volume between the left and right? I have seen this on my turntable, new turntables, …every turntable…. and have recorded brand new records on brand new turntables, and for -whatever- reason one channel is always slightly higher. I feel like I’m seeing a UFO here… WHAT the hell is up with this situation?
2. Why would anyone record or save anything for archiving in any file format other than .WAV (for audio) and .TIF for visual images?
Yes, I have MP3’s… but I consider those “wal mart” versions of the actual music.
3. Does anyone else have an obsession to record all their vinyl 12″ singles into CD singles so they can ditch the original vinyl?
4. Does anyone else consider CD’s to be perfection? I do because they are plastic, and you cannot accidentally erase plastic. Also, they are just like vinyl, only portable and the artwork is protected in beautiful clear plastic. I also like having everything on CD because you can sit there and actually be proud of the fact you have stuff remastered on CD singles that never came out on CD singles but F______ should have had the record companies had a damn clue. 🙂
I finally have that 12″ of Fleetwood Mac’s BIG LOVE in digital perfection from a sealed archived copy… and then I put the 45 RPM single artwork to it, since the 12″ had an ugly “generic co. sleeve.” So in 100 years from now, there will be, in someone’s possession, CD singles for every 12″ I have.
A question really, I also have a lovely Technics SL 1200 and currently its connected to my Technics AMP – however I want to record Vinyl as MP3 onto my laptop – Am I to presume if I get the pre AMP as mentioned this will work, would I have to take my Technics AMP out of the equation to record ? or can I still listen to the record being played via the Technics AMP whilst it is being recorded ?
If that makes sense ?
Simon, sounds like an older amp, maybe it has a tape loop that you can use the “TAPE OUT” to connect to your computer? Usually you would leave the amp on PHONO so you can hear it and select TAPE or TAPE MONITOR (“TAPE IN” input) to hear the recording back (if you hook your sound card output up to that input).
More generally, you can get test LPs that have various tracks useful for setting up your turntable, most useful are the white/pink noise tracks where both channels are recorded at the same amplitude. You can use these to set the gains per channel to avoid the one-channel-louder problem.
1210´s are not the best to use ripping vinyl. Nor it is best to use when DJ. Out of the box as it is, they don´t cut it for either job if you have strong emphasis on audio fidelity
As a DJ tool they suck. To high torque and quartz-lock makes them a pain. To my use they require the quartzlock hack to make them smooth as CDJ to work with. (I know it will make them less torque-y (but in a club, who gives a damn, they are a whole different experience and dream to work with)
The biggest weakness with the 1200/1210 is the internal PSU (Power supply unit )which creates a hum through the whole deck and ultimately to the output and your speakers. In a club, this is not an issue of course due to high levels. But for ripping, you hear it, always, no matter how new they are.
In my experience, dependable what you are going to use them for, they need modification. In this case its for ripping vinyl. I went along with mine ripping out the existing PSU from it´s inside and externalizing it. Using the original one is fair enough since it has the correct voltage. If you know how to solder and measure the voltage it can be done with some time and dedication.
One can always buy a third party made PSU. but they cost from 300 dollars and up.
But my point, external PSU is a must if you intend to rip with a 1200 Technics. I heard many rips done with one, and the hum is always there.
The art usb phono plus link that you provided is for the previous version, you are using the art usb phono plus v2.
In the manual for the regular phono plus it says the default format should be “2ch, 16bit, 44.1kHzâ€, is the version that you are using allow for 24/96 recordings?
Thanks for the info.
Can you transfer a phono recording to a digital file i have a record i need to do this with. If you don’t do this do you have any reccomendations
Stumbled across your post last night after looking for advice on exactly this, but how nice to realise we use the same equipment!
Actually I have a Tascam US122 for the bridge but have Technics 1200s and Sound Forge too so that was good to see.
A few things I’ll add in to the mix:
– One comment above mentioned your recordings being quiet. This is something I have noticed with Sound Forge recordings and haven’t yet worked out a way to boost the signal without the audio clipping. I’ve seen a program mentioned around online called MP3Gain (http://mp3gain.sourceforge.net/) It apparently finds the coding within the mp3 for the volume and raises it, without actually re-encoding the audio file itself. I’ve not used it yet but have been thinking about it, if anyone has any input would be much appreciated.
– You didn’t mention slipmats, although I realised from the intro this got a lot longer than you intended and there’s probably a million things you could have talked about and still not be finished! That said, I’ve been doing some research into slips as I’m trying to get into archiving my wax. For DJing I use butter rugs which are amazing when you’re cutting and scratching, but terrible for archival purposes. I’ve just bought a cork slipmat off ebay and am interested to see how it performs. I’d never even thought of such a thing before but randomly found one on ebay and did a little research and reviews seem to be overall positive.
– Someone in the comments mentioned concorde styli. First I believe these aren’t even supposed to be used on S tone arm tables? Also they won’t work for archiving as they’re for club use.
I hope this hasn’t come across as me poking holes in your article as I’m very grateful to have read it and pick up some tips and wanted to give my 2 cents from my limited knowledge in case it helps someone in the future!
Great article! I have been doing a lot of recording of vinyl for years as well. I do like my Music Hall MMF 5.1, which happens to be a belt-driven table. I record all my files as .WAV so I can make “regular” CDs from them. Cannot agree with you more on ClickRepair and SpinClean! ClickRepair is by far the best click and pop removal program for its price range. I like Audacity for recording, but its click/pop removal is dismal at best. Also dismal is DAK’s program. You can actually hear where it is taking out the pops and clicks when you listen to their samples. I use SpinClean on ALL records (even new ones) before recording.
Really no-nonsense guide, love it. I’m an audio engineer for a living, but I’ve recently been getting into vinyl. I have a both a few tips and a question!
Firstly, recording at 192khz – most people agree that you actually loose quality, especially if you’re converting it back to 44.1 – I would stick to 44.1 24bit (the extra headroom will let you normalise/process without loosing fidelity.)
Second, when it comes to balancing left and right, try using a fairly modern track with a strong vocal and balance it by ear so that the phantom image appears central. Sometimes tracks will have a lot of variation from left to right so it’s much harder to do by eye.
And for my question; I have an old Pro-ject Debut II and a raga phono mini USB, but even on new records I get a huge amount of pop (but not so much of the crackle?!) Not sure what’s going on with it, I’m still using the stock stylus so it might be that?
I’m considering just buying an SL-1200 but I don’t want to do this only to find I’m just doing something stupid! 😀
Many thanks,
MixingWizard
Sounds like static. Maybe use a record cleaner or anti-static brush.
Did you mean “lose” quality?